Monday, December 16, 2013

DIY Concrete Countertop

updated old 60's bathroom tile with concrete countertops

I think the tile was redone in the 80's because it was done so poorly!  Either way, the old school way was to use wire mesh and concrete to lay the tile on, so it was a messy project to get the tile up!  After all was said and done the results are gorgeous and the process fairly easy.  If you are into the modern look you will probably find the result as beautiful as I do!


the best before pic I have, but you can see the "before" countertop here-

ugly old sink with lovely tile job surround
I just LOVE the bathtub faucet

the beginning...  tap off tile and find concrete.  Not what I expected!  
This is when hubby comes home and says "what did you do?"

so we had no choice but to go forward with my "little update" that would be "easy"...

countertop is gone!

measure and cut a piece of plywood for the bottom and facing side.
I wanted a 2.5" edge, and I wanted it to overhang the edge of the counter.
I found that the drawers were perfect for a 2x4 to lay on and attach the facing wood piece, so the concrete would pour into the overhang.  You can just build a frame for it if you don't have drawers.

Mix up your concrete.  I used 5500 psi Maximizer because it has smaller aggregate

As you mix you can add color.  I used charcoal.
then pour the concrete onto the plywood frame.  I used rolled up magazines for the plumbing holes.
Be sure and vibrate the edge so the concrete gets down the front to make a clean edge.

when it dries it looks like this!  I used a belt sander to smooth it out a bit. (this process is very dusty so have good ventilation and use heavy duty masks)

next we made smaller frames for the backsplash and sides.  Pour your concrete in and let set

attach the sides with construction adhesive and grout or seal the edges.
Seal the concrete with concrete sealer and buff with carnauba wax (you can find this at an auto parts store)

tile goes up

and Ta-Da!

I love our new counter, and it has held up beautifully!
 

Now to tackle the bathtub area...

Wednesday, August 28, 2013

Our Backyard Tiki Oasis at Night

Everything looks different at night.  

Just add some cool light!


The Recycled Window Greenhouse

Tiki Man 

Monday, August 26, 2013

Bamboo

Buddha Belly Bamboo


This is a clumping variety of bamboo we planted in the backyard.
We planted it a little over a year ago and it has gotten super full and tall.  Apparently if you prune it back from the bottom the inner branches get fatter.  I would have done this already but if anything goes wrong and it starts turning brown or something my husband would probably beat me with a cane of it.
I'll take a picture of the whole thing tomorrow to give you an idea of how large it is.


So I decided to cut it.  Now you can see the canes getting bellies!  And there is a lot of new growth at the bottom.  I read that if you don't cut the leaves growing from the bottom of the canes, the bamboo will die in the center from lack of sun and grow in a ring.


Black Bamboo

This is black bamboo, a running variety. 
It's been in the ground for about a year, next year this thing should take off.


Friday, August 23, 2013

Tiki Carvings

The Tiki Men

A friend of a friend was selling 2 tiki mask carvings, so we decided to give them a new home.
We picked them up in our truck.  See how big it is!!! Granted, the truck is small but you get the idea.
They are carved out of palm tree trunks.  One's hiding under the blanket.


This is how they looked when we got them.


I stained them a dark brown.  Looking good so far!


Then I painted them to bring out their expressions a little more.
After the paint dried I coated them in spar-urethane so they could be outside and not get water damage.
They turned out pretty freaking cool!
I think the Tiki Gods would be impressed.


Tuesday, August 20, 2013

How to make a DIY pond

Our Backyard Pond

This is how we made our beautiful pond.


The first and hardest part is digging a hole.  Keep in mind that ponds thrive best in part shade.  Pond plants need sun, but fish like cool water, so a balance of sun and shade are best.  If you build under a tree that sheds leaves you will be scooping leaves out in the spring.

We trimmed all the roots and removed all the rocks from the inside the hole and lined the bottom and sides with carpet so any remaining rocks or growing roots won't puncture the liner.


Have a Beer


Rest in the giant, carpeted hole you have made


The most expensive part was the liner.  Don't skimp on this part!  You don't want to have to replace a crappy liner a year later after all your hard work.  Weigh down the sides of the liner with bricks and fill with water.


We dug a trench around the entire pond, trimmed, pleated and buried the overlap of liner in the dirt.


Time decorate the edges of your pond with various rocks to create a beautiful surround.


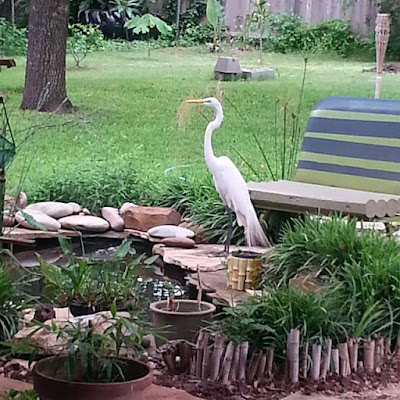
Now just add fish and plants.  Get ready for lots of new visitors to come check out your new pond!


Make sure to leave ramps for frogs to exit the pond after a dip!


DIY Recycled Greenhouse

We made an awesome greenhouse out of recycled windows on the cheap!  


It was so easy and turned out so cool I wanted to share how we did it so you can do it too. 

First you have to make a level surface to build from.
We used cinder blocks with all-thread cemented into the openings.


The 2x6 boards were drilled to slip over the all-thread, then bolted down.  I covered the all-thread with bottles so Melvin wouldn't injure himself.  Now we have a level surface to build our walls!


Now it's time to build the frame.  We used 4x4 posts, 2x4's  and brackets to build a simple frame.
Ours is designed to have a roof that slopes towards the back, so the front is slightly taller than the back.


For the walls we patched together various windows we found at habitat for humanity, craigslist, and neighbors getting new windows installed.  It was a little bit of trial and error, and I change my mind a lot.  Some of the windows crank open.  For more ventilation we put hinges on several windows so they can pop open on hot summer days.


We painted our greenhouse white, so I guess it's really a whitehouse.


Finally time for a roof.  We found some smoky corrugated plastic-like material on craigslist.
I don't know what it is, but it works great!  It provides shade and lets light in, so it's perfect for greenhouses.


a few views from the inside...


Here she is after a few years, looking as gorgeous as ever.


We added a gutter to the back and a rain collection barrel.
(It's covered in bamboo on the right-hand side)
Now we just need some rain!


looks super cool at night!